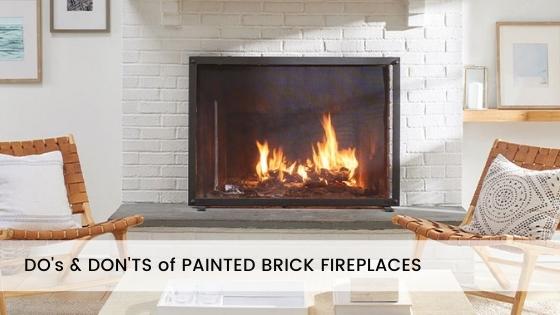
Your Guide on Painting a Brick Fireplace
The fireplace often acts as the focal point of any room. If it is dingy, dirty, discolored, or drab then it can quickly create a negative impression of the space. Even having the brickwork professionally cleaned will often not help because its appearance might make the whole home seem dated. Luckily, you do have DIY options to instantly breathe new life into the space — Yes, you can paint your fireplace.
We will explore the dos and don’ts of a painted brick fireplace. Painting the brickwork might sound like an easy task, but it’s not. It’s going to take foresight, preparation, and a bit of demanding work to ensure the job comes out looking good and, most importantly, lasts. You don’t want the paint to start flaking or peeling a week, month, or year after you complete the arduous task.
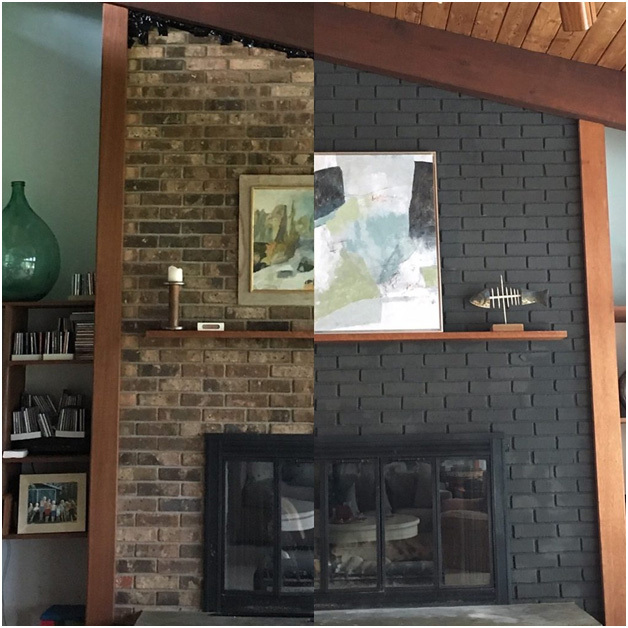
Start Researching Fireplace Looks and Trends
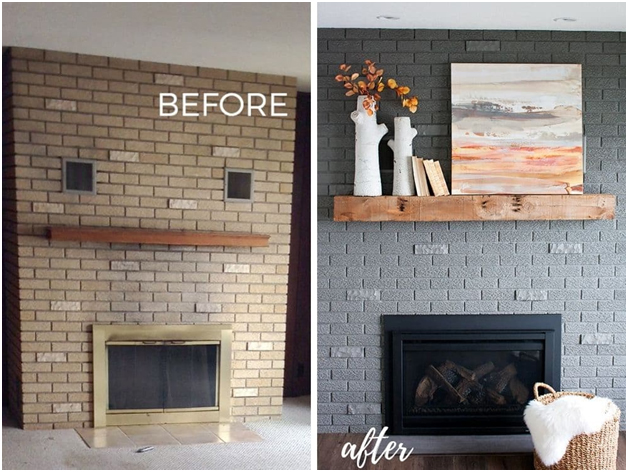
You’ll want to have a concrete idea of what you want your fireplace to look like before you start the DIY task of painting the bricks. Visit websites online to examine before and after photos of brick fireplaces to determine what you like.
- Do you want a subtle appearance?
- Maybe something more traditional?
- You can also pick a rustic look to make the whole room feel cozy.
- If you like taking a walk on the wild side with your room decor then why not spice up the space with bold and dramatic hues?
DO narrow down your color choices before you visit the paint store to make a final purchase.
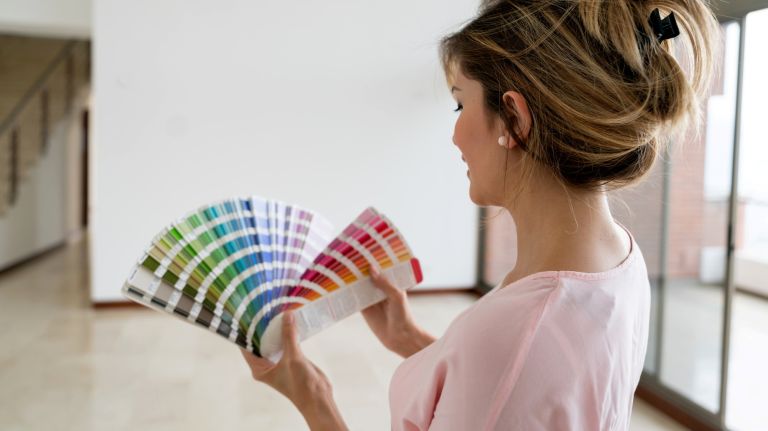
When picking paint hues, grab a few favorite samples to compare alongside the brickwork and determine how the color will look in the room’s light before you commit to a shade and make a decision. Remember, you DON’T want to choose the wrong color and have to redo the paint job later.
Prepping Before You Paint the Brick Fireplace
DO some extensive prep work before you start actually painting the brickwork of the fireplace. The prep work is going to require getting your hands dirty and focusing on cleaning (in some cases years of accumulation) the oily soot and dirt buildup on the bricks.
- Vacuum the bricks thoroughly to remove any cobwebs, hair, or loose debris.
- Use a wire brush coupled with a heavy-duty cleaner and dish soap to remove the grime from the surface of the bricks.
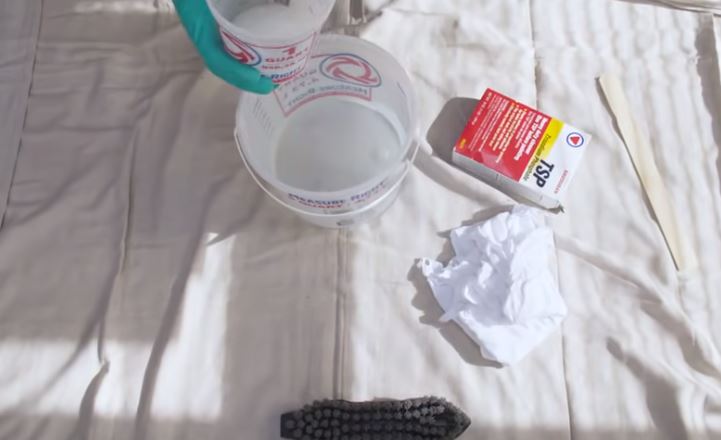
You’ll want to let the bricks dry at least 24 to 48 hours before you even think about painting. Bricks are somewhat porous and so is the mortar so even though the surface might not appear wet, the brick could still seep out moisture after cleaning which will quickly ruin your paint job.
Inspect the Mortar
DO take the time to inspect the mortar of the brick fireplace before painting. The paint will look better, and it is a matter of safety. If the mortar is flacking or cracked, then you’ll want to have the areas of concern repaired before painting. Typically, if there is mortar damage, then you’ll need a professional to repair the problem spots.
Priming the Bricks
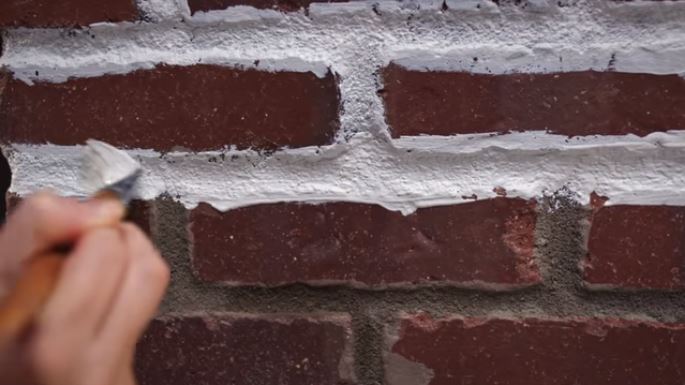
DO use a latex primer to prime the bricks if they have never been painted on before. The primer helps to seal the bricks which lets the paint adhere better to the surface. You’ll enjoy a smoother appearance. The newly applied paint will not start to flake off the bricks. Also, the primer can help reduce the number of coats needed to achieve the finish you seek.
Masonry Paint
DO use masonry paint. You’ll find paint designed for use on bricks in a wide array of colors. Most paint stores can mix masonry paint in any hue you desire. The formula is adhering nicely to the brick and is exceptionally durable.
Semi-Gloss or Gloss Paint
Honestly, this is a matter of taste. Some people will say to not use a semi-gloss or gloss paint because it makes the bricks look fake, but others argue that the surface is easier to clean, and the brick’s flashy appearance is visually appealing. At the end of the day, it’s all about the personal taste and appearance you are trying to achieve. Choose flat, semi-gloss, or gloss paint depending on your particular likes and dislikes.
Picking the Right Roller
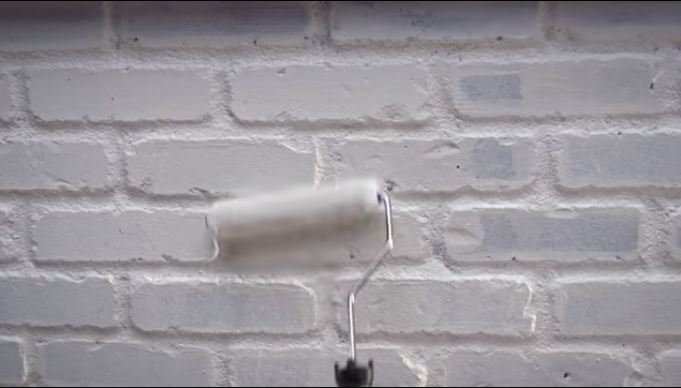
DO use a roller that features at least a 1-inch nap so the paint will sink it the cracks and crevices of the brick and mortar. If you pick a roller with less nap, then the paint will not be evenly distributed across the brick, and it will look poor. Your goal is to achieve a smooth finish across all surfaces of the brick to help hide imperfections and create a seamless appearance when dry.
Remember the Paint Brushes
DO make sure you have at least a few paintbrushes of varying sizes ready to reach the nooks and crannies around the bricks. A roller will do well for the bulk of the paint job, but with varying paintbrushes, you can put the final additions on the masonry to truly ensure it looks outstanding when complete.
At Least Two Coats of Paint
When painting the fireplace, DON’T try to skimp on paint. The brickwork will need at least two coats of paint to look good when dry.
Taping the Walls
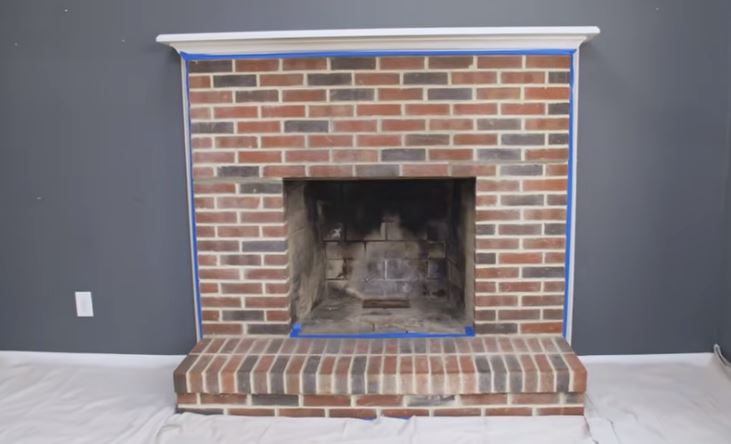
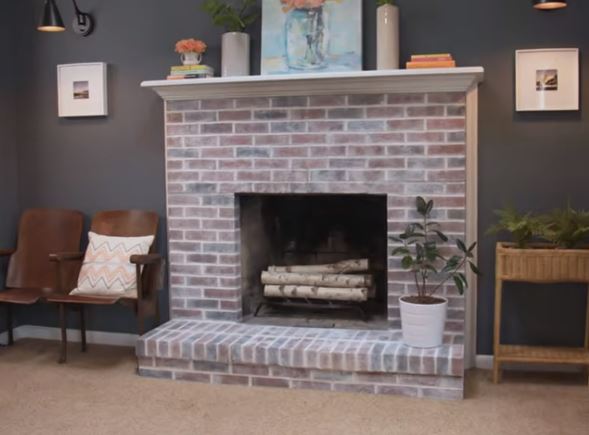
Before
Do use painter’s tape to tape the walls around the brick fireplace so the paint does not bleed knot the surface. Tape the walls alongside the brick. You’ll welcome the line of tape once you start the process of painting because you don’t have to fear a smudge and you can relax more while enjoying the painting task. The tape also helps reduce clean-up time. Once the paint dries, you can simply peel away the tape for a soft transition without smudges, splatters, or mistakes that you need to remove or paint over.
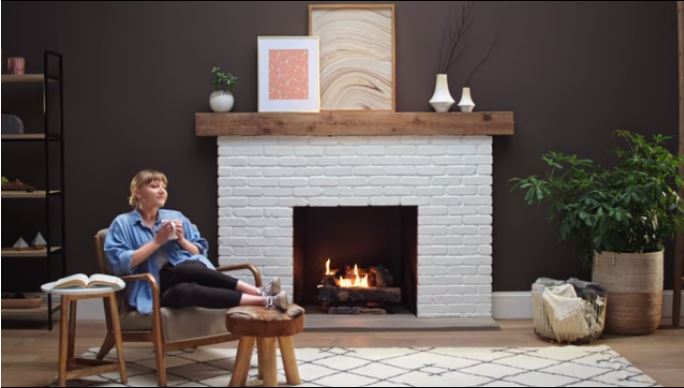
After
Painting a fireplace is an affordable way to give any home’s decor an instant facelift and makes your living space inviting!
If you are selling your home, painting the fireplace is a great DIY that can actually help ensure that a buyer falls in love with the space. Coupled with proper home staging, the residence will generate instant appeal.


The information is exactly what I was looking for !!!